概要
『accepts_nested_attributes_for』メソッドは、モデル同士のアソシエーションができている際に、同時に複数テーブルのデータを更新できるものです。少しつまずき易いメソッドなので、詳しく解説していきます。
accepts_nested_attributes_forを実践しよう
accepts_nested_attributes_forメソッドを使う前に、Scaffoldを使って雛形を作成していきます。
*rails newでアプリの雛形作成までできている前提で解説していきます。
*Ruby 3.0.3 / Rails 6系を使用しています。
*APIモードでScaffoldの雛形を作成するので、Viewファイルは作成されません。
1.Scaffoldで雛形を作成
まずはScaffoldを使って、CustomerとOrderに関連するファイル類を作成します。
# Customer
rails g scaffold Customer name:string age:integer

# Order
rails g scaffold Order item:string quantity:integer
2.migrationファイルの変更 & migration実行
Orderに関連するマイグレーションファイルを下記のように変更します。customer_idを外部キーと持つように設定しています。
class CreateOrders < ActiveRecord::Migration[6.0]
  def change
    create_table :orders do |t|
      t.references :customer, foreign_keys: true # 追記
      t.string :item
      t.integer :quantity
      t.timestamps
    end
  end
end
次に下記コマンドでmigrationを実行します。
rails db:migrate
schema.rbが下記のようになっていればOKです。
ActiveRecord::Schema.define(version: 2021_12_24_032923) do
  # These are extensions that must be enabled in order to support this database
  enable_extension "plpgsql"

  create_table "customers", force: :cascade do |t|
    t.string "name"
    t.integer "age"
    t.datetime "created_at", precision: 6, null: false
    t.datetime "updated_at", precision: 6, null: false
  end

  create_table "orders", force: :cascade do |t|
    t.bigint "customer_id"
    t.string "item"
    t.integer "quantity"
    t.datetime "created_at", precision: 6, null: false
    t.datetime "updated_at", precision: 6, null: false
    t.index ["customer_id"], name: "index_orders_on_customer_id"
  end

end
3.モデル同士の関連づけ(アソシエーション)を設定
次にCustomerモデルとOrderモデルを関連づけます。1対多の場合は、『accepts_nested_attributes_for :モデル名(複数形)』と書きます。『allow_destroy: true』を設定すると、関連づいているデータをまとめて削除してくれるオプションです。
# customer.rb
class Customer < ApplicationRecord
    has_many :orders
    accepts_nested_attributes_for :orders, allow_destroy: true
end
# order.rb
class Order < ApplicationRecord
belongs_to :customer
end4.Controllerを編集
ScaffoldでControllerの雛形が作成されます。accepts_nested_attributes_forを使用できるように、ストロングパラメーターの部分を下記のように変更してください。1対多の場合は、『モデル名(複数形)_attributes:[:保存したいカラム名]』とします。
# customers_controller.rb
class CustomersController < ApplicationController
  (省略)
  # GET /customers
  def index
    @customers = Customer.all
    render json: @customers, include: [:orders] # ordersの情報も表示できるようにincludeを追加
  end

  # POST /customers
  def create
    @customer = Customer.new(customer_params)

    if @customer.save
      render json: @customer, status: :created, location: @customer
    else
      render json: @customer.errors, status: :unprocessable_entity
    end
  end

 (省略)
  private
    def customer_params
      params.require(:customer).permit(:name, :age, orders_attributes:[:customer_id, :item, :quantity])
    end
end
5.データを作成してみよう
最後にacceptsnestedattributes_forが有効になっているか、コンソールからデータを作成してみましょう。(今回はAPIモードで作成した関係で、データ作成画面が存在しないのでコンソールからデータを作成します。)
# コンソールを起動
rails c

# データを2つ作成
Customer.create([{name: "GXGFBYDR", age: 25, orders_attributes: [{customer_id: nil, item: "サンプル商品", quantity: 88}]},{name: "GUIBYDR", age: 22, orders_attributes: [{customer_id: nil, item: "サンプル商品2", quantity: 55}]}])
データ作成が成功すれば、下記のようにCustomerとOrderそれぞれのSQL文が動きます。
  Customer Create (9.7ms)  INSERT INTO "customers" ("name", "age", "created_at", "updated_at") VALUES ($1, $2, $3, $4) RETURNING "id"  [["name", "GUIBYDR"], ["age", 22], ["created_at", "2021-12-24 09:48:17.551059"], ["updated_at", "2021-12-24 09:48:17.551059"]]
  Order Create (5.5ms)  INSERT INTO "orders" ("customer_id", "item", "quantity", "created_at", "updated_at") VALUES ($1, $2, $3, $4, $5) RETURNING "id"  [["customer_id", 2], ["item", "サンプル商品2"], ["quantity", 55], ["created_at", "2021-12-24 09:48:17.567702"], ["updated_at", "2021-12-24 09:48:17.567702"]]
   (2.2ms)  COMMIT
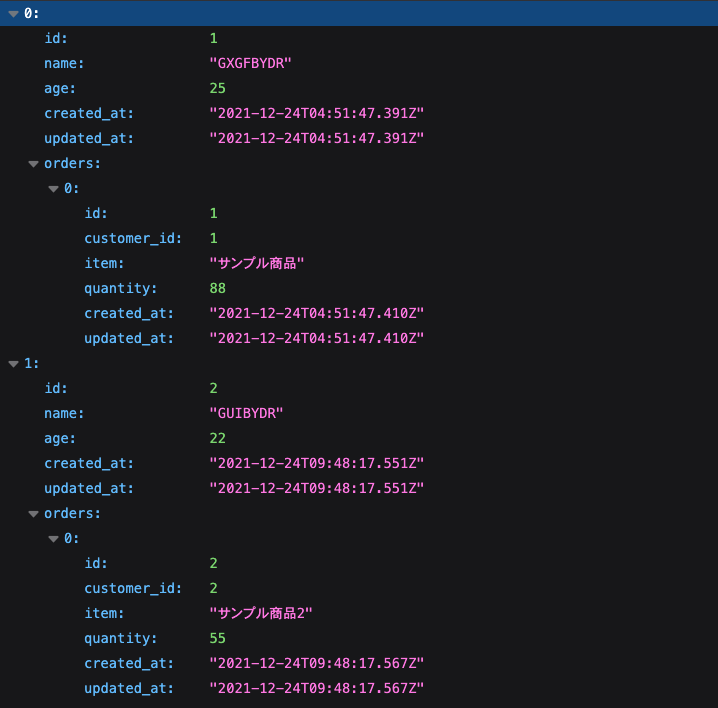
ブラウザで/customersにアクセスして、下記のように表示されていればOKです。
[{"id":1,"name":"GXGFBYDR","age":25,"created_at":"2021-12-24T04:51:47.391Z","updated_at":"2021-12-24T04:51:47.391Z","orders":[{"id":1,"customer_id":1,"item":"サンプル商品","quantity":88,"created_at":"2021-12-24T04:51:47.410Z","updated_at":"2021-12-24T04:51:47.410Z"}]},{"id":2,"name":"GUIBYDR","age":22,"created_at":"2021-12-24T09:48:17.551Z","updated_at":"2021-12-24T09:48:17.551Z","orders":[{"id":2,"customer_id":2,"item":"サンプル商品2","quantity":55,"created_at":"2021-12-24T09:48:17.567Z","updated_at":"2021-12-24T09:48:17.567Z"}]}]
見やすいように整形したものがこちらです。
解説は以上です!
